Thursday, February 19, 2015

Emmett Savage

we have FINALLY decided on a name.  not having a name from the get-go was a little nerve racking this time around, along with everything else we had going on.  Matt and I couldn't agree on what we liked, and we didn't love any of our list of names we could agree on.

we have to upgrade our vehicle since 3 car seats won't fit in our Outback, which made me sad :(  I love my car and will be sad to give it up.  Matt really wanted to get a minivan, but I really didn't want a minivan.  I think he was having a hard time finding an SUV that would work for us, so he came up with a compromise: if I agreed to a minivan we could use my name choice... so I agreed.  I can always ditch it after we don't have car seats anymore! ;)
I'm looking forward to meeting our newest little guy, and the boys talk about the new baby a lot so I think they're excited, too :)

Thursday, December 18, 2014

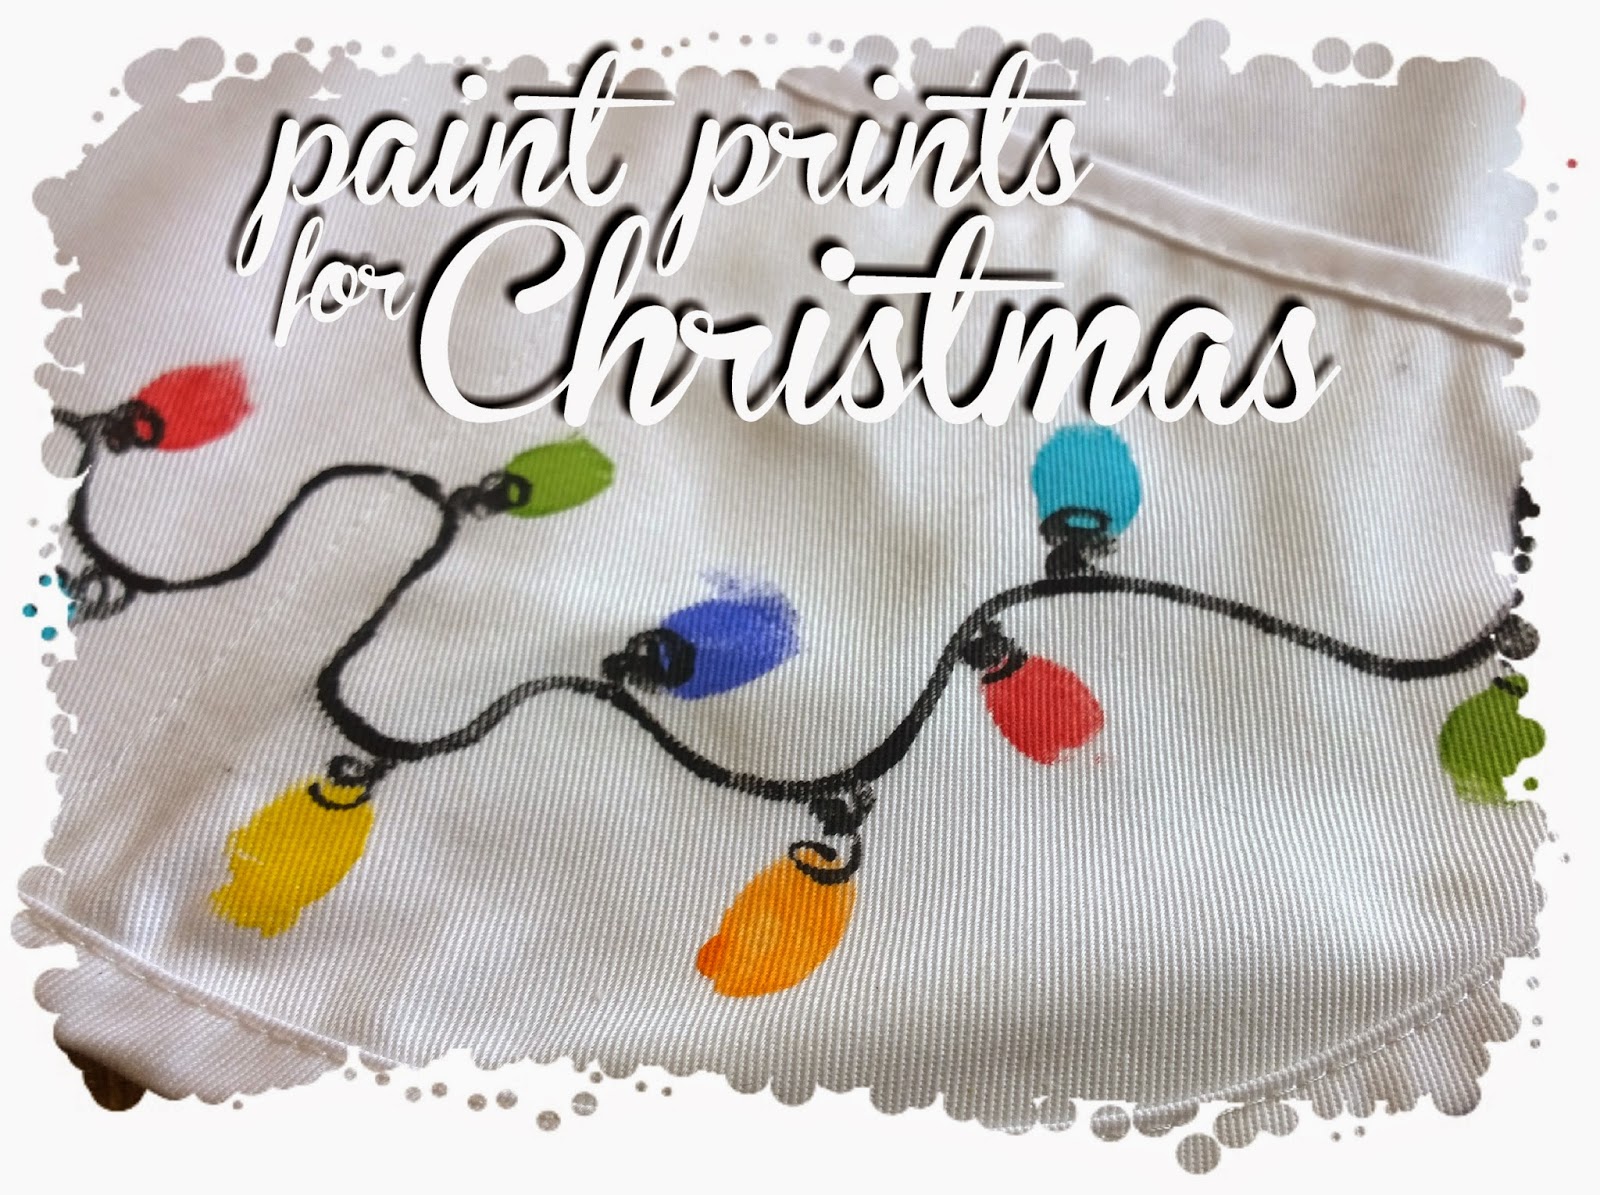
paint prints for Christmas

the boys and I found some time after Thanksgiving to do a little Christmas crafting for their grandmothers.  this holiday season wasn't feeling much like Christmas for me for various reasons, but I really wanted to make these cute penguin prints and I think this project helped get me more in the mood for festivities :)
I picked up a couple of white aprons from Hobby Lobby to decorate.  all the boys had to do was sit still for a black footprint, and I painted the details on after those were dry.  the simple footprints ended up being a lot messier than I remember on past paint projects.  maybe it was the black paint on the white surface... I don't know.  they still came out cute.
we added some fingerprint string lights for a border, which I think really helped finish it off.  this was time consuming, but easier to control than the footprints since we went one finger at a time instead of a whole foot.  I added their names and year as well.
there's still room at the bottoms to add more, so maybe next year we can add some reindeer.

Monday, December 15, 2014

Jack's Christmas stocking

I forgot to post about Jack's Christmas stocking last year.  poor guy has just slipped through the cracks ;)  but I did make it in time for his first Christmas.
I decided I didn't like the fabric I chose after I finished it, but I'm used to it now.  I think it makes the colored felt pop a little more.
  
he of course got a Jackalope, I put a xylophone on it to remember one of the first Christmas gifts we gave him, and his snowman is a cowboy.
I was on the fence about putting "Jackers" on it, but since that silly name has followed him beyond the family (and it'll probably stick until he's old enough to tell us to stop calling him that) I went ahead and did it.  he might not even notice.  I didn't notice mine said Candi until I was in highschool!
I loved seeing all our matching stockings out growing up, and hearing the jingle bells when they moved - such a simple but fond memory of Christmas as a kid.  it's something that I'm glad I carried over to our family :)  I'm already gathering ideas for the stocking I will be making next year!

Thursday, December 11, 2014

handmade for Christmas

we're mostly packed up here waiting to move into our new house, so my crochet stuff is really the only craft stuff I have access to anymore... not that I've been doing much else in the way of crafts for a while now!  I'm looking forward to having a room again that I can keep my sewing machine set up in, and maybe a table to work on my jewelry.  until then I'm just crocheting when I get a chance.  here are some gifts I made and sent to my brother in Shreveport for Christmas.
I made a square hat for Abbie with a zig-zag puff stitch.  I had to make the construction of this hat up as I went, but it's pretty forgiving since it doesn't have any shaping to it.  joining the puff stitches in each round was the hard part, but I made it work.  this could totally be done as a flat piece and then seamed together, though.  I put tassels on the top corners to look like pig tails, and I made some boots with puff stitch flowers on them to match the hat.
Ava got a striped slouchy hat (another pattern I made up as I went) and I added a puff stitch flower to the bottom band.  I used Red Heart Soft for all of these hats, which gets even softer when you steam or wash it.  I steamed the slouchy part of this hat which made it lay really nice, but I made sure to leave the band at the bottom alone in case it relaxed too much.
Ashton's hat is an earflap beanie that I decided to find an actual pattern for.  I used Micah Makes free pattern, but I added an extra row of single crochet to the edge and put a line of fringe on top for a mohawk.

Monday, December 8, 2014

advent calendar garland: finished!

this was a fun project to work on, and I finished it just in time!  the garland is hung with some clear command hooks in our entryway, but I'm hoping next Christmas, in our new house, we'll have a better place to hang it.
I wasn't sure how to hang these up to begin with, but after I finished them all off I decided to just make a long chain and attach them at each loop.  I might do something different with them later on, but I'd just have to undo to chain and they'll all be detached again.  maybe when the kids are older they can be hung on the tree after each day.
I used some number beads and buttons on each one, which are also easily removable in case I brainstorm a different way of hanging and numbering them in the future.  Leo has been good at keeping track of what day it is, so if nothing else I'm really glad to have this to help him understand dates!
I stuffed each one with a small goody for the boys to have everyday until Christmas, and the boys were already excited about it after the first day.  they wake me up early each morning to see what is in the next one.

Tuesday, November 11, 2014

advent calendar garland: crochet hats

I winged this pattern the first time and it came out exactly as I hoped, so I wrote it down.  I did it bottom up, which I normally don't like to do, but this one made sense to do that way since it was pointy, and the ribbing would match the look of the mittens and stockings (patterns available here and here).  you'll need 12 hats for the garland.
hat pattern

ribbing:
ch 7, 1 sc into back bump of 2nd ch from hook and following 5 sts, ch 1 and turn.
1 sc into back loop of each st across, ch 1 turn.  repeat for 26 more rows.
fold ribbing in half and sl st closed.

body of hat:
ch 1, make 30 sc sts, equally spaced, around the top edge of ribbing, sl st to join round.
ch 1, sc into each stitch around, sl st to join.  repeat for 4 more rounds.

decreasing:
ch 1, *1 sc into next 4 sts, 1 sc2tog, repeat from * 4 more times, sl st to join.
ch 1, 1 sc into each st around, sl st to join.
ch 1, *1 sc into next 3 sts, 1 sc2tog, repeat from * 4 more times, sl st to join.
ch 1, 1 sc into each st around, sl st to join.
ch 1, *1 sc into next 2 sts, 1 sc2tog, repeat from * 4 more times, sl st to join.
ch 1, 1 sc into each st around, sl st to join.
ch 1, *1 sc into next sts, 1 sc2tog, repeat from * 4 more times, sl st to join.
ch 1, 1 sc into each st around, sl st to join.
ch 1, 5 sc2tog, sl st to join.
ch 1, 1 sc into each st around, sl st to join.
fasten off with a 10" tail, using yarn needle, thread yarn tail through the front loop of the remaining 8 sts and pull tight.
weave in ends.

attach pom pom to top of hat.

optional loop:
fold hat in half, attach yarn to the top left corner of ribbing, ch 10, sl st to first ch, tie knot with starting tail and weave in ends.

Monday, November 10, 2014

advent calendar garland: crochet stockings

I sorta mixed-n-matched some patterns to make a stocking.  I used the basic starting point of the mittens (check out the previous post here for the pattern), but didn't increase for the thumb part of the hand.  when it was long enough to my liking, I did the heel and toe like Yolanda demonstrates in her Christmas stocking video tutorials.  you'll need 7 stockings for the garland.
stocking pattern

ribbing:
ch 7, 1 sc into back bump of 2nd ch from hook and following 5 sts, ch 1 and turn.
1 sc into back loop of each st across, ch 1 turn.  repeat for 20 more rows.
fold ribbing in half and sl st closed.

body of stocking:
use the same color yarn or attach new color.
ch 1, make 24 sc sts, equally spaced, around the top edge of ribbing, sl st to join round.
ch 1, sc into each stitch around, sl st to join.  repeat for 8 more rounds.

heel:
use the same color yarn or attach new color.
ch 1, sc into 12 sts, ch 1 and turn.
sc2tog into first 2 sts, 1 sc into each st across, sc2tog into last 2 sts, ch 1 and turn.
repeat decreasing row until you have 4 sts left.
2 sc into first st, 1 sc into each st across, 2 sc into last st, ch 1 and turn.
repeat increasing row until you have 12 sts again, ch 1 turn.
1 sc into all 12 sts across.
fold heel in half, right sides facing, and sl st or whip stitch seams together. 

foot:
use the same color yarn or pick up yarn from before the start of the heel.
ch 1, sc around ankle and heel (24 sts), sl st to join, ch 1 and turn.
1 sc into each st around, sl st to join, ch 1 and turn. repeat for 6 more rounds.

toe:
use the same color yarn or attach new color.
ch 1, *1 sc into first 4 sts, sc2tog.  repeat from * around, sl st to join, ch 1 and turn.
*1 sc into 3 sts, sc2tog.  repeat from * around, sl st to join, ch 1 and turn.
*1 sc into 2 sts, sc2tog.  repeat from * around, sl st to join, ch 1 and turn.
*1 sc into 1 st, sc2tog.  repeat from * around, sl st to join, ch 1 and turn.
sc2tog 4 times, sl st to join.
fasten off with a 10" tail, using yarn needle, thread yarn tail through the front loop of the remaining 4 sts and pull tight.
weave in ends.

optional loop:
fold stocking in half with heel on the left side, attach yarn to the top left corner of ribbing, ch 10, sl st to first ch, tie knot with starting tail and weave in ends.

Sunday, November 9, 2014

advent calendar garland: crochet mittens

I saw a mini mitten garland in one of the shops on the Strand in Galveston and thought along with some stockings and hats, it would make a cute little advent calendar.

I started crocheting November 1st, my goal to make one a day so by December 1st it would be ready to go.  I always cram too much into my holiday seasons, why would being pregnant, having an ill household, and house hunting make the slightest difference in the workload I put on myself? :\  so far it's going okay, though.  one a day is definitely a doable goal.

I'm using up leftover scraps from my yarn stash, other stuff I had on hand, and the patterns are free.  this project mostly cost me my time in the evenings while I watch TV, so besides it coming along to be adorable, it is practically free and I love that! :)

so this first pattern is mittens.  you'll only need 6 of these. I would say this is the more difficult of the patterns, so once you learn this one the rest will come easier.

the preschool size mittens pattern from CrochetMe is what I'm using.  I usually prefer videos, but this written pattern is easy enough to follow.  I think hers is worked in a continuous circle from the way it's written, but the copy I have below is written so that each round is joined.  it's still basically the same, I just typed it out so it was easier for me to work from.

mitten pattern

ribbing:
ch 7, 1 sc into back bump of 2nd ch from hook and following 5 sts, ch 1 and turn.
1 sc into back loop of each st across, ch 1 turn.  repeat for 19 more rows.
fold ribbing in half and sl st closed.

body of mitten:
ch 1, make 23 sc sts, equally spaced, around the top edge of ribbing, sl st to join.
ch 1, 1 sc into each of the next 10 sts, 2 sc into the next st, 1 sc into each of the next 2 sts, 2 sc into the next st, 1 sc into each of the next 9 sts, sl st to join.
ch 1, 1 sc into each st around, sl st to join.
ch 1, 1 sc into each of the next 11 sts, 2 sc into the next st, 1 sc into each of the next 2 sts, 2 sc into the next st, 1 sc into each of the next 10 sts, sl st to join.
ch 1, 1 sc into each st around, sl st to join.
ch 1, 1 sc into each of the next 12 sts, 2 sc into the next st, 1 sc into each of the next 2 sts, 2 sc into the next st, 1 sc into each of the next 11 sts, sl st to join.
ch 1, 1 sc into each st around, sl st to join.
ch 1,1 sc into each of the next 13 sts, 2 sc into the next st, 1 sc into each of the next 2 sts, 2 sc into the next st, 1 sc into each of the next 12 sts, sl st to join.
ch 1, 1 sc into each st around, sl st to join.
ch 1, 1 sc into each of the next 14 sts, 2 sc into the next st, 1 sc into each of the next 2 sts, 2 sc into the next st, 1 sc into each of the next 13 sts, sl st to join.
ch 1, 1 sc into each of the next 12 sts, skip the next 10 sts (for thumb), 1 sc into each of the next 11 sts, sl st to join.
ch 1, 1 sc into each st around, sl st to join.
repeat previous round for 9 more rounds.
ch 1, [1 sc into each of the next 6 sts, sctog] 2 times, 1 sc into each of the next 5 sts, sc2tog, sl st to join.
ch 1, [1 sc into each of the next 3 sts, sc2tog] 4 times, sl st to join.
ch 1, 1 sc into each st around, sl st to join.
ch 1, sc2tog 8 times, sl st to join.
fasten off with a 10" tail, using yarn needle, thread yarn tail through the front loop of the remaining 8 sts and pull tight.
weave in ends.

thumb:
join yarn to any thumb stitch and make 10 sc stitches around, sl st to join.
ch 1, 1 sc into each st around, sl st to join. repeat for 5 more rows.
ch 1, sc2tog 5 times, sl st to join.
fasten off with a 10" tail, and using yarn needle, thread yarn tail through the front loop of the remaining 5 sts and pull tight.
weave in ends.

optional loop:
fold mitten in half with thumb on the right side, attach yarn to the top left corner of ribbing, ch 10, sl st to first ch, tie knot with starting tail and weave in ends.
Thursday, November 6, 2014

April 20th, 2015

so this is what #3 looks like at 9 weeks :)  I've been so sick and haven't felt like doing anything, so this is coming really, super-de-duper late.  I'm 16 weeks now and am finally feeling better.  it's felt like ages, but I almost feel normal now.
Dollar Tree pregnancy test - got my money's worth.
I started feeling pregnant a couple of weeks before I got a positive on a home pregnancy test, so I wasn't surprised, but it was still exciting to see the line show up.  I left it out where I knew Matt would find it, and he was thrilled - it's all he can do to not tell everyone he comes in contact with as soon as he knows we're expecting, which I know was very difficult for him while a lot of his family were in town recently.
the last, big, disgusting thing I ate before morning sickness moved in and kept anything good from entering my stomach.
food became tricky by week 4.  nothing sounded good and anything I did manage to choke down didn't sit right.  salad was alright, but not filling or satisfying at all.  I tried to eat small amounts of different things, which worked okay for a few days, then I would start craving one thing and burn myself out on it.  I never felt like I craved much with my first two pregnancies, but this time I actually, really wanted those giant pickles, and ate pickle after pickle.  I just kept shoveling them away to the point that at the end of the jar I wanted to drink the juice - this has never been appealing to me.  ever.  I did stop myself because I could only think how dehydrated I would be after!  I also tried some pickle flavored Lays... I do not recommend these.  apples seem to be my only friend right now.
I think Jack senses his role as the baby coming to an end because I've been getting more cuddles and random kisses from him.  he also wants to lay on my stomach - I didn't like that one so much when I was feeling like I was about to toss my cookies (which was all the time), but I tried to stand it as long as I could because there won't be room for him there much longer, and by the time there is room again, he might not be interested in sitting in my lap :(
I was trying not to say too much to Leo about it early on since he has such a good memory and repeats everything he hears, but now I try to talk more with him about the new baby because he understands more of what's going on than Jack does, and I'd like him to be prepared for another sibling.
stuff-wise, we are set if this is a boy, but we are totally at odds on boy name choices so I'm really hoping it's a girl this time!  we just have to wait a few more weeks to see.  luckily we're at the end of the year when the weeks just fly.
16 weeks

Thursday, September 11, 2014

there's no crying is baseball

Leo is in his first Pee Wee Tee-Ball league.  he was so excited about it when we signed him up - he told me about it almost everyday.  he had two practices before the game and did so much better than I thought he would... for the first one.  then when it was time to go to practice again he was not on board.  he cried the whole time :(  then the next day at the game he screamed "I don't want to play!" for about 30 minutes straight.  we decided to leave early and spare everyone else there from listening to him cry for the next hour.
he told us all weekend after the game that he didn't want to play in the next game and that he just wanted to watch.  we said okay, but that he had to go.  there was no fit throwing, so that was a start.  Matt was able to get him to sit in the dugout and be quiet, then he agreed to toss the ball a little before the game, and before we knew it he was on the field and ready to play.
he got a little upset at the end when he was in the field and didn't get to catch the ball every time, but the snack in the car on the way home fixed that.  he told me he wasn't going to play again, so I guess we'll have to work on him before every practice and game!

Thursday, August 28, 2014

little fingerprints

we made fingerprint gifts for Nana's birthday.  the boys just love painting, so I didn't need to twist their arms or bribe them to help me make these.  they do have their limit on how long they'll let me paint their fingers and press them onto things before they try to take over, though!
we painted a cute ceramic mug I found at Target with Martha Stewart opaque glass paint and then baked it in the oven.  I bought extra mugs just in case, and I'm glad I did!  I thought a grey mug with mostly white prints and some color here and there would be cute, but for some reason the white did not work well at all :\  so I went with just the color paints on the white mug and they worked great.
while we had momentum going we did a picture frame with regular acrylic paints.  I'm hoping to get a good picture of the boys at my sister-in-law's wedding this weekend to put in the frame!
I was going to have the boys make a card, but decided to decorate a plain white bag that doubles as a birthday card instead.  this was a two day project...
but I really love the balloons :)

Thursday, August 21, 2014

corner to corner triangle shawl

I crocheted this shawl for a friend of mine using the corner to corner afghan tutorial from The Crochet Crowd, with 4 skeins of Caron Simply Soft yarn, and a 6mm hook.
I've made scarves with this pattern in the past, but this is the first time I've used a solid color yarn.  with variegated yarn the focus is the patchwork of color, so I never noticed before the cool texture it makes!
instead of a rectangle or a square, I did a triangle.  I just increased like the pattern says to, and when I thought it was long enough I simply didn't decrease back down to the other corner.  I did a scallop around the two straight edges to match the "unfinished" long edge, but this is totally optional and I think I'd skip it if I did this one again.


if watching a video isn't your thing, here's a link to a written pattern provided by Artiamus Imura: Corner to Corner Triangle Shawl