Showing posts with label tutorial. Show all posts

Thursday, August 21, 2014

corner to corner triangle shawl

I crocheted this shawl for a friend of mine using the corner to corner afghan tutorial from The Crochet Crowd, with 4 skeins of Caron Simply Soft yarn, and a 6mm hook.
I've made scarves with this pattern in the past, but this is the first time I've used a solid color yarn.  with variegated yarn the focus is the patchwork of color, so I never noticed before the cool texture it makes!
instead of a rectangle or a square, I did a triangle.  I just increased like the pattern says to, and when I thought it was long enough I simply didn't decrease back down to the other corner.  I did a scallop around the two straight edges to match the "unfinished" long edge, but this is totally optional and I think I'd skip it if I did this one again.


if watching a video isn't your thing, here's a link to a written pattern provided by Artiamus Imura: Corner to Corner Triangle Shawl

Thursday, July 10, 2014

seed beads and jump rings bracelet

I got a bracelet from a wool shop in Ireland that I just love.  I did a search and found out Lesley from The Gossiping Goddess came up with this one (it's at the bottom of her tutorial page).
I love how it feels, so I thought I'd try to make another like it... but I ended up making quite a few!
I used 6/0 seed beads and 4mm jump rings, which were the closest to the suggested sizes I could find.  because the jump rings were so small the cording needed to be thin.  I tried embroidery floss and hemp cord - I like the feel of the embroidery floss, but the hemp cord might hold up better.

I also did a few with stretch cord, but they were a little trickier - I like the seamless look and how easy they are to put on, though.

Thursday, June 20, 2013

pressed flowers hand soap dispenser

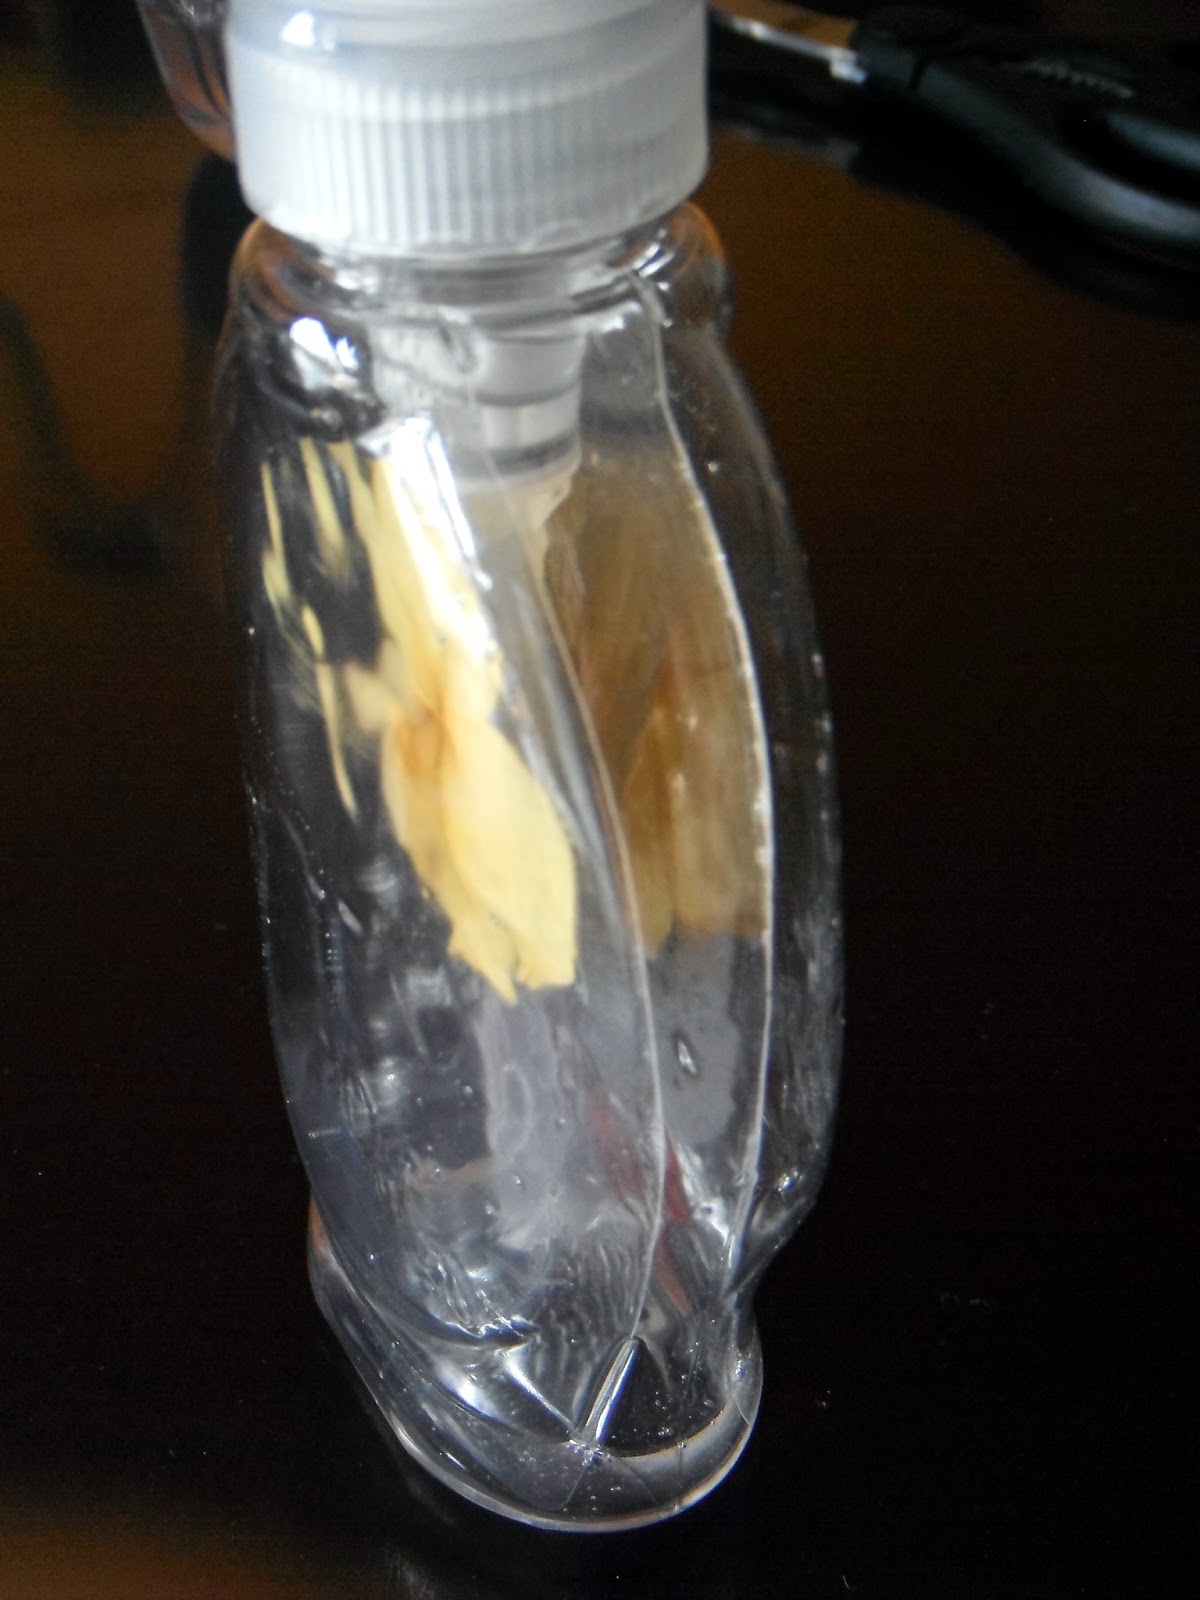
this is the soap dispenser I did for Mother's Day with laminated pressed flowers.  I've never laminated anything (besides paper at work) so I wasn't sure how this would come out, but it really made the colors of the pressed flowers pop.  I pressed rose petals and cut them to a nice size/shape and added stems from weeds growing in my yard to create made-up flowers.  I'm sure this is a big no-no in the pressed flower world, but I wanted something pretty and this was how I could achieve it with what I had.
I started by making a template to cut around later.  after tracing the dispenser I went in about 1/4" from the outer line and trimmed it until it looked like it would fit inside.
I laminated my flowers making sure to leave lots of space around each of them, placed the template under the transparency and traced around it with a dry erase marker so the lines would easily wipe off later, and cut it out.
I put the insert I already cut on top of the other to decide how I wanted the position of the other to be, and traced around that one the same as before, but on this one I left the top a little longer so it was easier to separate the two once they were in the dispenser.
I removed the labels from the outside, and drained the soap from the dispenser so it was easier to put the inserts inside.
I rolled the inserts together (making sure the front was facing the side I wanted to use for the front) and put them inside the dispenser.
the tricky part was prying the front and back inserts apart so I could put the pump tube in between them, but it really wasn't that difficult with one of the tops being a little higher than the other.  once the pump tube was in I just poured all the soap back in.
I like the ones I did initially better, but even just these two "flowers" makes this cuter than the regular dispenser.  I suppose I could always add more layers as I find more flowers to press.

Thursday, May 16, 2013

wire bails

after making the fractured marble pendants a while back I have had so many new visitors to my blog  - thanks all you pinterest fiends ;)  over 24k views.  crazy.
when I started baking the marbles, I realized I didn't have any bails to turn them into necklaces with - whoops.  so I grabbed some wire from my stash and cranked out a few quick bails.  I thought for half a second "should I put this process in there?"  and never did because at that point I was done making them.  shoulda coulda woulda.  so, 8ish months later here is how I did them.

Thursday, September 27, 2012

flat marble necklaces

I watched some videos on making fried marbles (or baked marbles, since that's a common way to do it now) and did some image searching for project ideas.  there's some pretty cool stuff out there that people have done that looks super simple.  I love this one - on the lookout for small round marbles now!
 
I have really been wanting to make some for a while so I finally picked up some flat marbles at the Dollar Tree and E6000 from Michael's to try this little number out.
I made some wire bails while I baked my marbles and whipped up a few quick pendants during nap time.
 
it might be that I'm more sensitive right now, but it took about a week or so for the adhesive stink to go away - something to keep in mind next time I need to use that glue!
I noticed that the darker ones didn't shatter as much on the inside.  I don't know if they should be heated longer or what.  I did mine at 500°F for 30 minutes.  they sizzled and popped when they went into the ice water like it said they should in the tutorial, and I could see the light colored ones had small fractures throughout immediately.  I left them in the water for 15 minutes waiting for the darker ones to finish up, but they pretty much had just a few larger cracks through them and that was it.  I tried re-baking some, and that didn't really do anything except make some of them break apart.
I might try alcohol inks someday if I revisit this type of project so I can just use the clear ones that crack really nice and make them whatever color I want.

Thursday, September 13, 2012

for a wee Scot

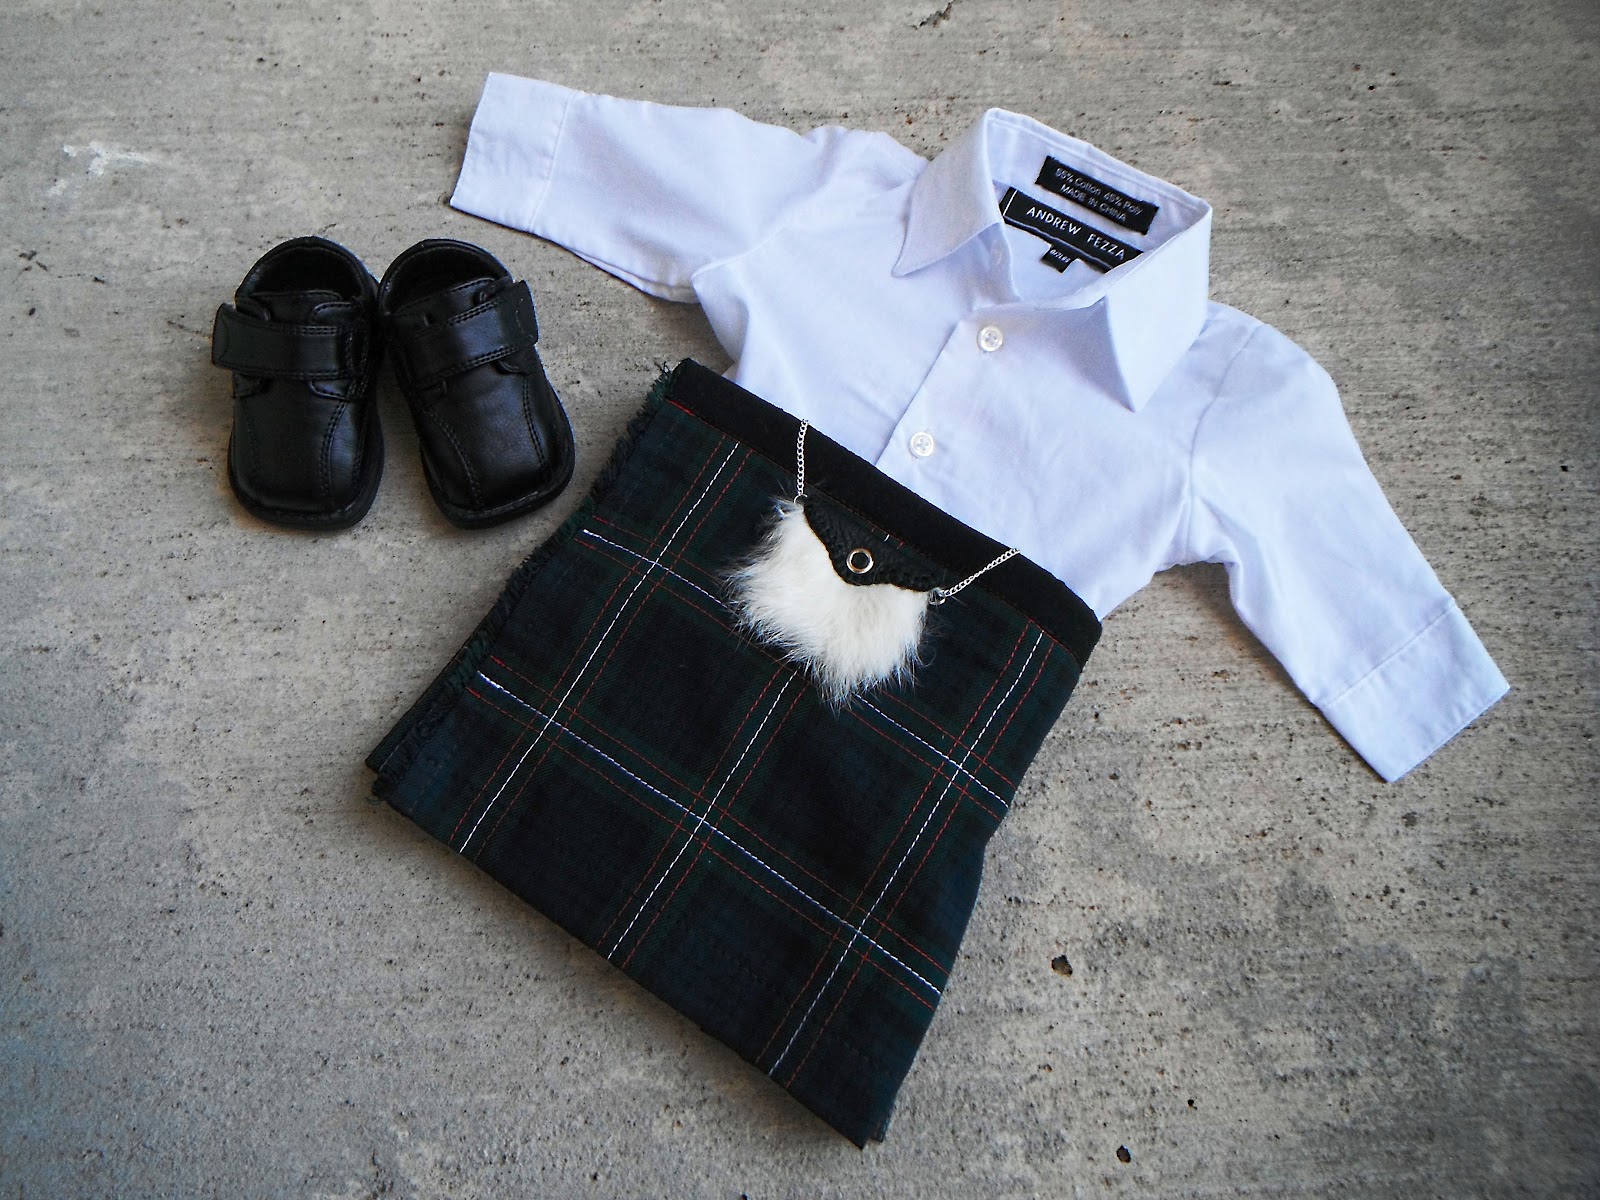
I made a kilt for my friend's baby, Jude.  I did one for her husband years ago when they got married, so I thought their son should have a cute matching one :)
I've made 4 in the past 8 years so I figured I'd just wing it... but after looking at photos of the first one I did it came back to me how much was involved and I decided to look for a little help online.  I basically needed a picture to see the inside and refresh me a little, so I scanned through this site to jog my memory.  I looked at a lot of pictures of baby kilts, too, to get an idea of length and inspire me.  I used one of Leo's little onesies and took some measurements and sorta just guessed at the size since not all babies come in the same size and shape!
I put velcro at the waist, so it should be adjustable for a little while.
I figured it'd be easy enough to find a white collared shirt onesie, but I feel like that was the hardest part of the outfit to acquire!  I finally found a little suit at Burlington Coat Factory that came with a regular dress shirt, so I just grabbed a white onesie from the sale rack at Kohl's and attached it to the bottom using this tutorial.
I found these cute shoes at Payless that I paired with some longer white socks from Carters - also another hard find!
I used some leather scraps and rabbit fur I had to make a tiny little sporran that I attached to small pieces of double sided velcro to sandwich in the waist overlap, which I think really finished it off nicely :) 

Thursday, August 16, 2012

crochet washcloth

I crocheted some washcloths to put in a basket for my Nana's 80th birthday.  I used a natural looking ecru yarn by Sugar 'n Cream and this pattern.  with an H hook, the 2.5oz skein got me two washcloths with maybe 12" left over!  cuttin' it a little close so I'm glad I was able to make two finished washcloths and didn't have to buy another skein just for a few yards or something.  I'd like to do more but I think each one took me about two hours to do, so if I have time and get a chance I might go get another skein and make two more.
I ironed some ribbon to a piece of 8.5"x11" freezer paper and ran it through my printer to make the label so she sees that I made them for her in case I don't get to see her open the basket.  makes it cute, too :)  there's so many tutorials out there that tell you how to use your inkjet printer to print on fabric, but here's one I found that covers the basics.  I don't recommend using ribbon for smaller fonts since it spreads a little before the ink dries and looks fuzzy.  since this is just packaging, and even though I heat set it after I printed, it won't make it through the wash.  there is some kinda liquid stuff (Bubble Jet Set, I think) you can treat fabric with to make it washable after printing, but I haven't tried any yet.

Thursday, May 31, 2012

flip flop fix

if he's not wearing them out, he's outgrowing them - it's so hard to keep Leo in shoes!  I was glad for sandal weather until I saw how much little flip flops are - jeez!  he's in that perfect size that either everyone else is also and they're all gone, or they're more than I'm willing to pay for a month or so's worth of wearing.  I happened to find his size at Old Navy (not in the colors I wanted but still cute), and though they don't cost much, I don't want him to wear them out with everyday use.  I went to the dollar store and found the smallest size I could (which was 8, but they're not that much bigger than what he wears) and added a head band to the backs to keep them on.  now he can wear these out in the backyard and to the park and save his nicer looking ones when we  go out to lunch or shopping.


Monday, May 21, 2012

belts for Leo

Leo is in a long and skinny phase where for his pants to be long enough they're too big in the waist, so I made him some D-ring belts.

to make a simple ribbon belt you'll need:
  • ribbon (grosgrain works best for me, but experiment and find what you like)
  • D-rings
  • sewing machine/needle & thread
  • optional: fray check or lighter
determine the length you want the belt to be (I made Leo's  24" long), double it, and add 3/4".  cut to size and melt the ends of the ribbon if it's synthetic, or glue them if it's natural fibers to keep them from fraying.
overlap the D-rings by 1/2" and sew across. with the other end, fold in half and overlap the end you just sewed by 1/4" and sew across really well.
sew from the end with the d-rings all the way down to the other end. turn and sew across the folded edge, then turn again and sew back up the other side to the d-ring end. turn again and sew across to where you started from, back stitch to secure your stitches, and that's it! 

Thursday, May 17, 2012

t-shirt refashion how-to

I got this shirt a few years ago with the intention of making it over.  after wearing it as-is for a while I finally changed it up, and it was so simple I wish I had done it forever ago!

supplies needed:
  • 2 t-shirts (or 1 t-shirt and scrap fabric of the same or similar fabric type)
  • sewing machine
  • scissors
lay the shirt flat, line up the seams at the shoulders and smooth down to the under arms. cut through both layers following the curve of the sleeve and taper in toward the neckline. cut the shoulders apart, fold the front down and re-cut the back so it's more narrow than the front.
pull the top part back up and trim the front so that it follows the back angle if you want to use the neckband as your casing, but I didn't like how it gathered so I cut off the neck band from the front and back making the front more of a straight line.
sew a hem on both sides going from the front to the back (or just leave it unfinished), then fold over 1/2" on the front and sew that down to make the front casing.
for the back casing cut a scrap of fabric to the same width as the back of the unfinished part of the top of the shirt (remember to add some for the seam allowances) and twice as wide as you want your casing to be.  if you want the back of the shirt higher make the casing long, and if you want it lower in back make the casing shorter. hem the sides of the scrap and fold in half.  with the unfinished edges together, line up with the raw edge of the shirt and sew across (I don't have a picture of that - sorry!) then flatten out the seam and sew across so that it lays flat.
braid 3 straps of the scrap together, sewing across the ends and cutting them straight.  put a safety pin on one end and fish it through the casing on the front and back of the shirt (no pic for this either) and mark where to cut it so the straps are the right length. straighten out the braid so it's not twisted and stitch both ends together so they're flat, and pull it back through the front casing to hide the join.
this step is optional:  take more scrap fabric and make a band for the bottom by cutting two rectangles that measure half of your hips (or wherever the shirt hits you) plus 1/2" for seam allowance, and twice as wide as you want the band to be.  put the rectangles right sides together (I used the wrong side of the fabric for mine) and sew along the short sides, then turn the tube down in half to make the folded edge.
insert the shirt into the tube so that the raw edges of the band line up with the bottom of the shirt, pin at the side seams and find the halfway points of the front and back on the band and the shirt and pin those spots together. stretch the band as you sew to make the fabric line up, then turn the band down.
I love the design of this shirt and will be making more of these for the summer :)